Export TOTP’s from LastPass Authenticator
TL;DR
If you want to export all TOTP’s from the LastPass Authenticator app, use this script.
Introduction
I’ve been an avid user of LastPass for a few years now. However, they decided to no longer support more than one device type, unless you pay a hefty fee. I use LastPass on both my laptop and Android phone, so that would become a problem. I started looking at alternatives.
Switching to another password manager
Switching password managers is simple enough. LastPass offers an export feature, and other managers offer import features. Moving passwords over takes less than five minutes.
Unless you also use LastPass Authenticator for your 2FA tokens. For some reason there is no official way to export all saved tokens from that app. The official advice is “disable it for all your accounts and re-enable it with a new 2FA application”. Yeah, no.
The LastPass Authenticator app does support “backup up” all your 2FA codes to your LastPass vault though:

This made me think. Maybe we can get our hands on that backup and use it? Let’s find out!
Getting at the Android app
This is the part were most tutorials tell you to go to some shady “apk downloader” website to download the APK’s you want to examine. However, there is a much easier approach if you have an Android phone and adb. It doesn’t have to be a rooted phone. You don’t even have to connect it to your PC via USB. Simply enable both “USB debugging” and “Wireless ADB debugging” in the developer menu. Also check out the developer documentation for more detailed instructions. Then, simply connect:
user@ubuntu2004:~/projects/lastpass$ adb connect 192.168.1.234:5555
connected to 192.168.1.234:5555
Then, test connectivity:
user@ubuntu2004:~/projects/lastpass$ adb devices
List of devices attached
192.168.1.234:5555	device

user@ubuntu2004:~/projects/lastpass$ adb shell uname -a
Linux localhost 4.14.117-perf+ #1 SMP PREEMPT Thu Jan 28 00:38:15 CST 2021 aarch64
Now you can ask the phone for a list of all applications installed and filter for the one you want:
user@ubuntu2004:~/projects/lastpass$ adb shell pm list packages | grep lastpass
package:com.lastpass.authenticator
package:com.lastpass.lpandroid
You can now use the package name to get the path to the APK on the phone:
user@ubuntu2004:~/projects/lastpass$ adb shell pm path com.lastpass.authenticator
package:/data/app/com.lastpass.authenticator-Q68KiibpwY2U1yzlomsy-A==/base.apk
And then pull it to your machine:
user@ubuntu2004:~/projects/lastpass$ adb pull /data/app/com.lastpass.authenticator-Q68KiibpwY2U1yzlomsy-A==/base.apk
/data/app/com.lastpass.authenticator-Q68KiibpwY2U1yzlomsy-A==/base.apk: 1 file pulled, 0 skipped. 12.9 MB/s (3992152 bytes in 0.295s)
And there you go. Guaranteed 1:1 Google Play matching APK’s.
Inspecting the application
Now, at this point it might the fair to mention that I wasn’t setting out on a big research project. I just wanted my original TOTP secrets. And fast. My initial plan of attack was to simply load the frida gadget into the authenticator app and install it back on my phone.
So I grabbed a recent copy of the excellent Objection toolkit by SensePost. This toolkit has a built-in command for injecting the frida gadget into an APK:
user@ubuntu2004:~/projects/lastpass$ objection patchapk -s base.apk
No architecture specified. Determining it using `adb`...
Detected target device architecture as: arm64-v8a
Using latest Github gadget version: 14.2.13
Patcher will be using Gadget version: 14.2.13
Detected apktool version as: 2.4.1
Running apktool empty-framework-dir...
I: Removing 1.apk framework file...
Unpacking base.apk
App already has android.permission.INTERNET
Target class not specified, searching for launchable activity instead...
Reading smali from: /tmp/tmplw_i6t_6.apktemp/smali/com/lastpass/authenticator/activities/SplashActivity.smali
Injecting loadLibrary call at line: 6
Attempting to fix the constructors .locals count
Current locals value is 0, updating to 1:
Writing patched smali back to: /tmp/tmplw_i6t_6.apktemp/smali/com/lastpass/authenticator/activities/SplashActivity.smali
Creating library path: /tmp/tmplw_i6t_6.apktemp/lib/arm64-v8a
Copying Frida gadget to libs path...
Rebuilding the APK with the frida-gadget loaded...
Built new APK with injected loadLibrary and frida-gadget
Performing zipalign
Zipalign completed
Signing new APK.
Signed the new APK
Copying final apk from /tmp/tmplw_i6t_6.apktemp.aligned.objection.apk to base.objection.apk in current directory...
Cleaning up temp files...
Do keep in mind that it needs these tools available in your path to function properly:
- adb
- aapt
- apksigner
- apktool
- zipalign
So make sure you have those properly set up. Now it’s simply a matter of uninstalling the old version, and installing the patched one. Again, you can use ADB for this:
user@ubuntu2004:~/projects/lastpass$ adb uninstall com.lastpass.authenticator
Success
user@ubuntu2004:~/projects/lastpass$ adb install base.objection.apk
Performing Streamed Install
Success
Now start the patched authenticator app and see if it worked by typing objection explore:
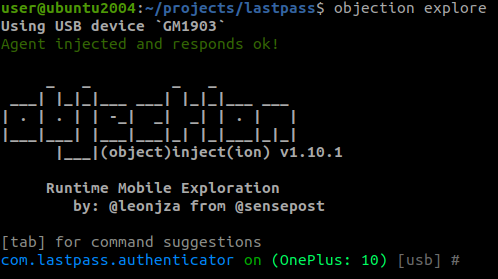
You can also use vanilla frida to connect:
user@ubuntu2004:~/projects/lastpass$ frida-ps -U
  PID  Name
-----  ------
24383  Gadget
Note that the application will hang until you connect to the gadget. Also, it will classify your phone as a “USB device” even though it’s connected through WiFi.
Small setback
Normally this would be pretty straight forward from here. Intercept traffic, hook functions, done. But not in this case. The authenticator app relies on the actual LastPass main application for authenticating to your vault, and authorizing it to upload and download backups.
The main application also relies on the Google Play services, so a vanilla emulator wouldn’t work.
Lastly, The main LastPass application would refuse to authorize the authenticator app if it detected tampering with the authenticator app (which I was doing to load in the Frida gadget).
After some trial and error, I settled on using the Genymotion Android emulator. It does require an account, but it’s free for personal use. It also offers a one-click installation of “Open GApps” and it’s virtual devices are rooted by default.
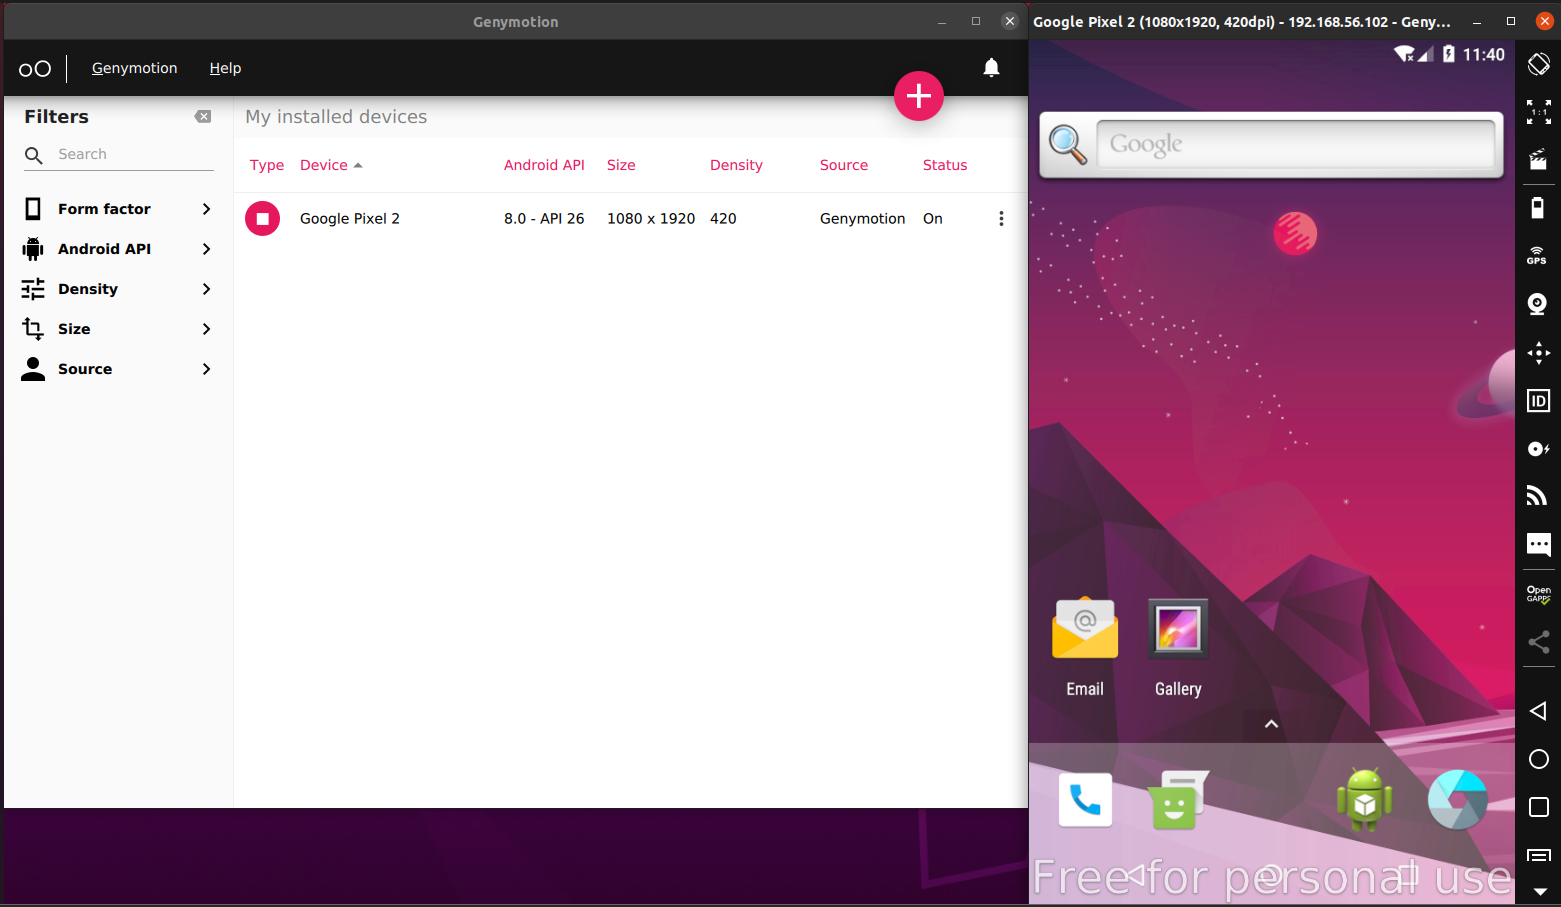
Bonus: I could just install both apps from the Play store. Do keep in mind that it uses VirtualBox under the hood, so enable nested virtualization if you’re running this inside a VM.
Hooking functions
Because the emulator offers rooted images out of the box, there was no need to inject the Frida gadget into individual applications. Just transfer frida-server to the emulator and run it as root.
Download frida-server with the correct architecture first:
wget https://github.com/frida/frida/releases/download/14.2.13/frida-server-14.2.13-android-x86.xz
See the download page here for the latest version. The Genymotion emulator architecture is x86. Then, uncompress the archive:
unxz d frida-server-14.2.13-android-x86.xz
Transfer it to the emulator:
user@ubuntu2004:~/projects/lastpass$ adb push frida-server-14.2.13-android-x86 /data/local/tmp/frida-server
frida-server-14.2.13-android-x86: 1 file pushed, 0 skipped. 74.8 MB/s (42925716 bytes in 0.547s)
Mark it as executable and run it (as root):
user@ubuntu2004:~/projects/lastpass$ adb shell
vbox86p:/ # su
vbox86p:/ # chmod +x /data/local/tmp/frida-server
vbox86p:/ # /data/local/tmp/frida-server
Finally, do a small test in a new terminal window to see if it works:
user@ubuntu2004:~/projects/lastpass$ frida-ps -U
 PID  Name
----  -----------------------------------------------
 258  adbd
 461  android.hardware.camera.provider@2.4-service
 462  android.hardware.configstore@1.0-service
 220  android.hardware.gnss@1.0-service
 463  android.hardware.graphics.allocator@2.0-service
 174  android.hardware.keymaster@3.0-service
 464  android.hardware.sensors@1.0-service
 465  android.hardware.wifi@1.0-service
 460  android.hidl.allocator@1.0-service
1502  android.process.acore
1348  android.process.media
 208  audioserver
 466  batteryd
 209  cameraserver
2895  com.android.calendar
[..]
If all went well, you can now inject into any application on the emmulator without patching individual APK’s.
Setting a proxy and intercepting traffic
This is a step I see most people struggle with, so let me share my default way of easily getting the traffic from an android app through Burp Suite.
- Create a reverse port forward via adb:
adb reverse tcp:8080 tcp:8080 - Set a global proxy to that port forward:
adb shell settings put global http_proxy 127.0.0.1:8080 - (Optional) Install the Burp Suite CA certificate as you normally would. A small piece of advice, use a low Android version. Certificate installation is harder in later versions. Version 8 seems to work okay for me.
That’s it. No weird iptables magic, system WiFi settings, etc. Just ADB. Also works perfectly on a regular, non-rooted android device that is not an emulator. To undo, run:
adb shell settings put global http_proxy :0
adb reverse --remove-all
To disable SSL verification in the LastPass Authenticator app, I used the “Universal SSL Bypass 2” from the frida codeshare. Open up the Authenticator in the emulator, and run:
user@ubuntu2004:~/projects/lastpass$ frida --codeshare sowdust/universal-android-ssl-pinning-bypass-2 -U com.lastpass.authenticator
     ____
    / _  |   Frida 14.2.13 - A world-class dynamic instrumentation toolkit
   | (_| |
    > _  |   Commands:
   /_/ |_|       help      -> Displays the help system
   . . . .       object?   -> Display information about 'object'
   . . . .       exit/quit -> Exit
   . . . .
   . . . .   More info at https://www.frida.re/docs/home/

[Google Pixel 2::com.lastpass.authenticator]->
After I was done reversing the app, I found that Objection could actually do the same but easier. So if you don’t want to bother with the codeshare route, just do this:
user@ubuntu2004:~/projects/lastpass$ objection -g com.lastpass.authenticator explore
Using USB device `Google Pixel 2`
Agent injected and responds ok!

     _   _         _   _
 ___| |_|_|___ ___| |_|_|___ ___
| . | . | | -_|  _|  _| | . |   |
|___|___| |___|___|_| |_|___|_|_|
      |___|(object)inject(ion) v1.10.1

     Runtime Mobile Exploration
        by: @leonjza from @sensepost

[tab] for command suggestions
com.lastpass.authenticator on (Android: 8.0.0) [usb] # android sslpinning disable
(agent) Custom TrustManager ready, overriding SSLContext.init()
(agent) Found com.android.org.conscrypt.TrustManagerImpl, overriding TrustManagerImpl.verifyChain()
(agent) Found com.android.org.conscrypt.TrustManagerImpl, overriding TrustManagerImpl.checkTrustedRecursive()
(agent) Registering job 458584. Type: android-sslpinning-disable
com.lastpass.authenticator on (Android: 8.0.0) [usb] # (agent) [458584] Called (Android 7+) TrustManagerImpl.checkTrustedRecursive(), not throwing an exception.
(agent) [458584] Called SSLContext.init(), overriding TrustManager with empty one.
(agent) [458584] Called SSLContext.init(), overriding TrustManager with empty one.
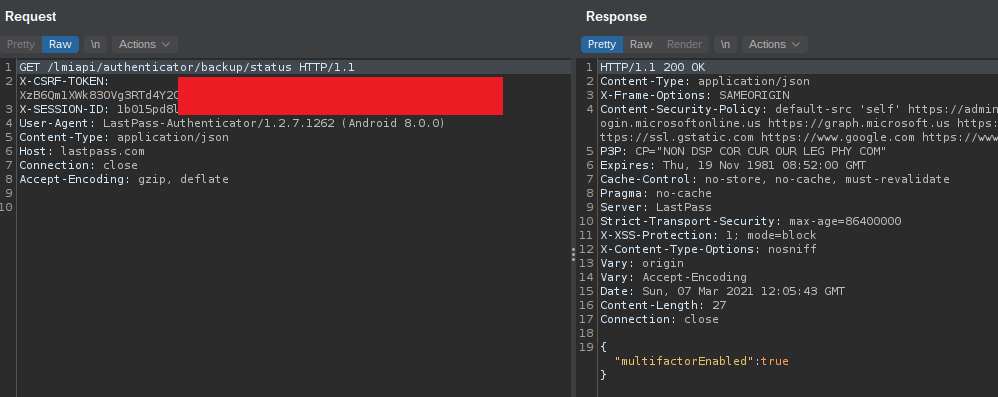
Traffic should now be flowing through Burp Suite:
Digging into the backup functionality
As it turns out, the traffic wasn’t all that exciting. Creating a backup involved a POST request to the URL https://lastpass.com/lmiapi/authenticator/backup with a BASE64 encoded blob as body:
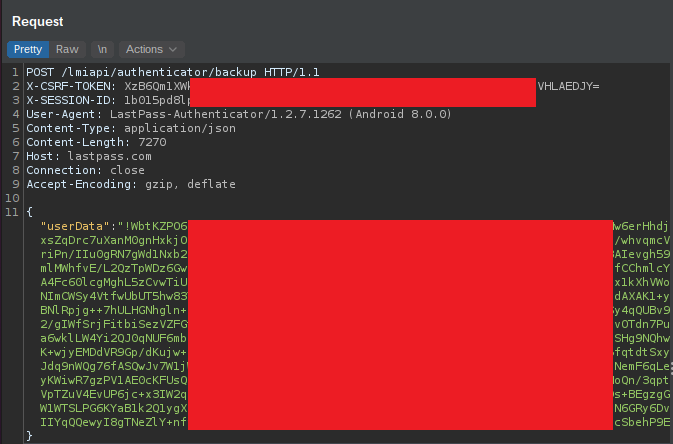
Retrieving the backup uses the same URL but with the GET method and no body. Authentication is done via two HTTP headers:
X-CSRF-TOKENX-SESSION-ID
The authentication part I assume is handled by the regular LastPass application as it doesn’t show up in the intercepted traffic. However, it seems to work in the same way as a normal web-based login. This login process has been talked about in detail by other people so I won’t go into it.
The TL;DR version is that once you log in, you receive a Session ID. With this session ID you can get a CSRF token at https://lastpass.com/getCSRFToken.php. You can then use those two tokens to upload and download TOTP backups to your LastPass vault.
Decrypting the blob
The BASE64 blob that is sent back and forth is actually two things. It starts with a ! character, followed by a small BASE64 string. Then comes a | character followed by a large BASE64 string.
People familier with how LastPass works will probably recognize this as standard LastPass practice. The first string decodes to a 16 byte IV. The second is the actual data, encrypted with AES-CBC.
So what is the AES key?
Let’s upon up the Authenticator APK in jadx to find out. Jadx is a decompiler similar to jd-gui, but with native APK support. No need to mess around with extracting the APK and finding classes.dex.
After loading the APK let’s do a search for “/backup” and see if we get any hits:
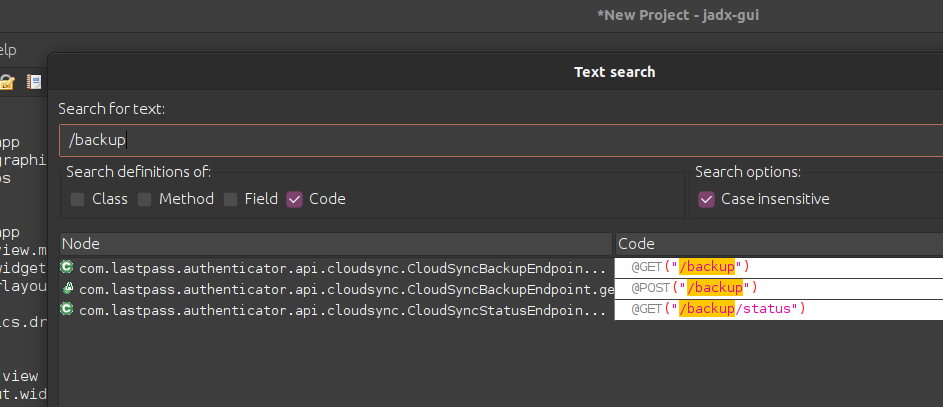
Awesome. We end up in a class called com.lastpass.authenticator.api.cloudsync.CloudSyncBackupEndpoint:
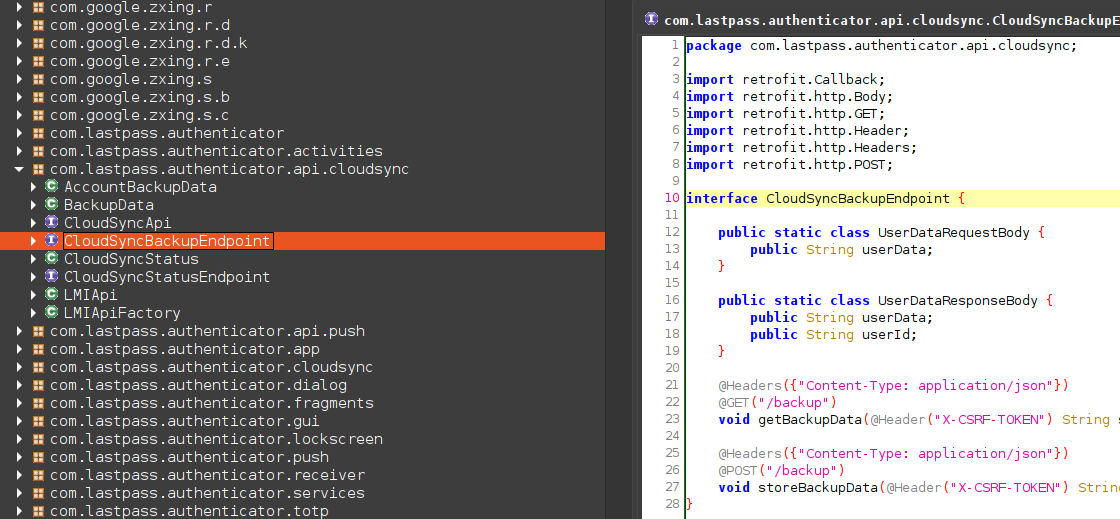
Not much to see here though. Let’s move on. Exploring the different com.lastpass.authenticator packages we come across com.lastpass.authenticator.cloudsync.CloudSyncSessionInfo. This class has some interesting functions such as:
- getEncryptionIV()
- getEncryptionKey()
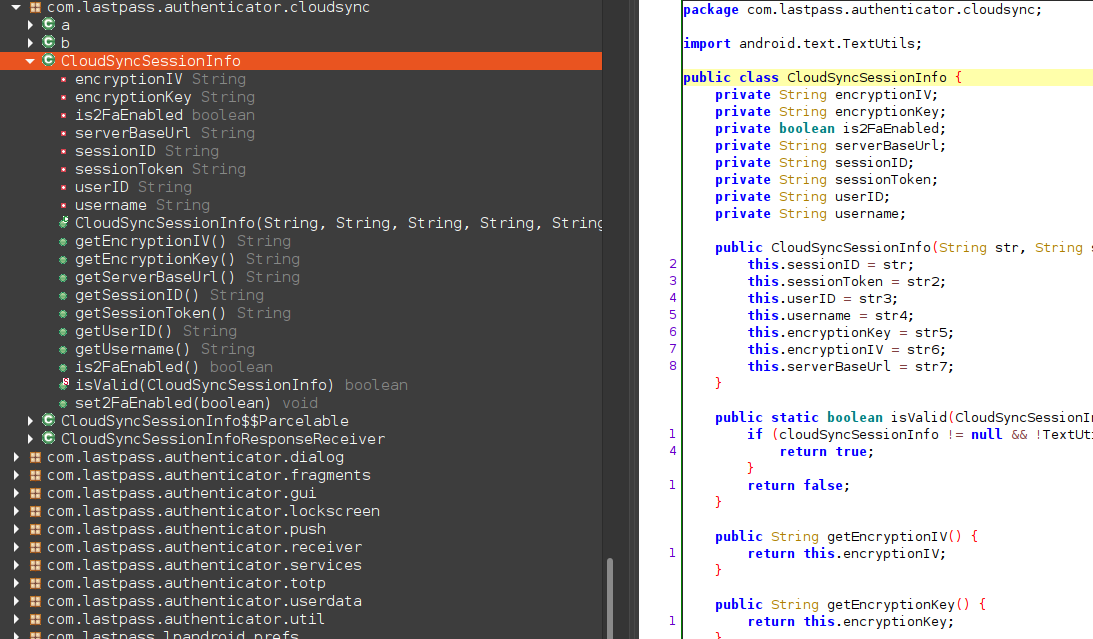
We have two choices at this point. Try and trace back where all these are used, or use objection and frida.
Guess which I chose.
Objection has a very neat feature where you can tell it to watch a class for usage. So that’s what I did for the CloudSyncSessionInfo class:

I then triggered a manual backup in the Authenticator app to check if I was on the right path. And it seems I was:

Let’s see if we can intercept the output of the getEncryptionKey() function. Objection can generate frida template scripts for all methods in a class. So for our class, we simply run:
com.lastpass.authenticator on (Android: 8.0.0) [usb] # android hooking generate simple com.lastpass.authenticator.cloudsync.CloudSyncSessionInfo
It then spits out JavaScript for every method in the class. For example, this is what it generated for getEncryptionKey():
Java.perform(function() {
    var clazz = Java.use('com.lastpass.authenticator.cloudsync.CloudSyncSessionInfo');
    clazz.getEncryptionKey.implementation = function() {

        //

        return clazz.getEncryptionKey.apply(this, arguments);
    }
});
We can easily save this to a file and inject it manually using Frida:
user@ubuntu2004:~/projects/lastpass$ frida -U com.lastpass.authenticator -l getencryptionkey.js
     ____
    / _  |   Frida 14.2.13 - A world-class dynamic instrumentation toolkit
   | (_| |
    > _  |   Commands:
   /_/ |_|       help      -> Displays the help system
   . . . .       object?   -> Display information about 'object'
   . . . .       exit/quit -> Exit
   . . . .
   . . . .   More info at https://www.frida.re/docs/home/

[Google Pixel 2::com.lastpass.authenticator]->
For now, it doesn’t really do anything. So let’s modify the script so that it prints the return value before actually returning it:
Java.perform(function() {
    var clazz = Java.use('com.lastpass.authenticator.cloudsync.CloudSyncSessionInfo');
    clazz.getEncryptionKey.implementation = function() {

        var retval =  clazz.getEncryptionKey.apply(this, arguments);
        console.log('[getEncryptionKey] => ' + retval)

        return retval
    }
});
After saving the script it’s automatically updated by frida, so no need to re-attach. Running the backup again now gives us:

I had to censor it for obvious reasons, but trust me, the key is there. Great. Let’s see if we can decrypt the blob now. One of my favourite tools for quickly testing encryption is CyberChef. Let’s put in our data:
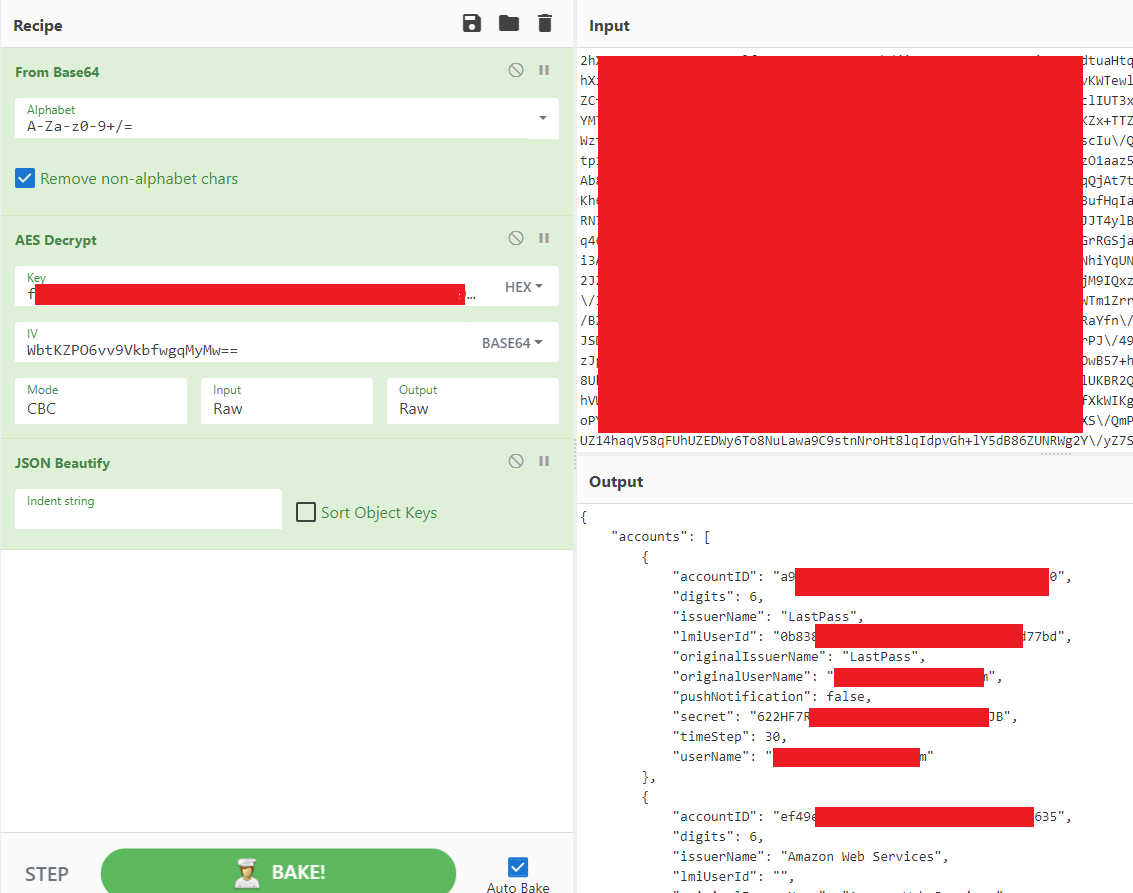
It worked! We now have all the information we need to import the TOTP’s into another application. One last thing we need to find out is how the AES key is generated. Turns out this is de default LastPass way of generating encryption keys. They even have a test page for it here:
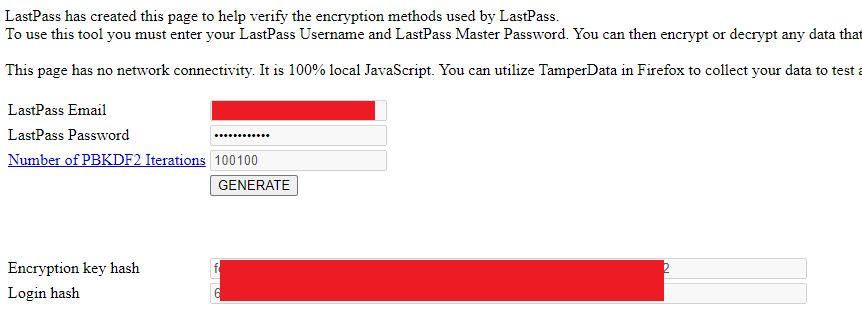
The encryption key hash is the same key that is used for encrypting our backups. In one line of python, the algorithm for generating this is:
key = hashlib.pbkdf2_hmac('sha256', password, username, iteration_count, 32)
The default iteration count is 100100.
Conclusion
This wasn’t really all that sophisticated in the end, but it kept me busy for a couple of hours. I’ve used the information gathered here to create a python script that will automatically log in to your vault, download the backup and convert them back to QR codes. You can find that script here.
