
No clouds, just sunshine. Disconnecting Somfy Connexoon from the cloud.
Update: 14-04-2022
Newer firmwares introduced some changes, namely:
- Root partition space is 100% used, so resizing is needed. See Optional: resize
- Password authentication for SSH is disabled. See: Note: password authentication
Also, if you want to use the new developer mode on your Connexoon you will either have to generate SSL certificates yourself. See the configuration files at /etc/lighttpd.d/ssl.conf and /etc/lighttpd.d/8443/devmodesocket.conf for hints.
Update: 22-09-2021
Added my notes on how to modify and re-flash the firmware. See Getting access. I was also able to “hack” the Tahoma custom integration for Home Assistant to support this. Check out this demo on YouTube:
Check the progress of the official integration here.
Introduction
I’ve bought some new shutters recently and got the Connexoon with my purchase for free. After connecting the device I was disappoinited to learn that it requires both an internet connection and an account to function properly. So for the last few days I’ve been working on a way to do away with that!

Goal
The goal for this project is to be able to control my Connexoon devices through Home Assistant without the need for the device to be connected to a cloud service and without the use of an account.
First steps
First thing I did was a little network discovery. Unfortunately, port scanning the device with NMAP resulted in 0 open ports. I started a packet capture on my router and saw the device connecting to several domains, but all of them used TLS and even required client certificate authentication.
So, next thing I did was open it up and take a look at the board. The device has no screws and can be pryed open with a flathead screwdriver or another thin piece of metal. The board itself isn’t anything special. One side has an ARM9G25 and some RAM:
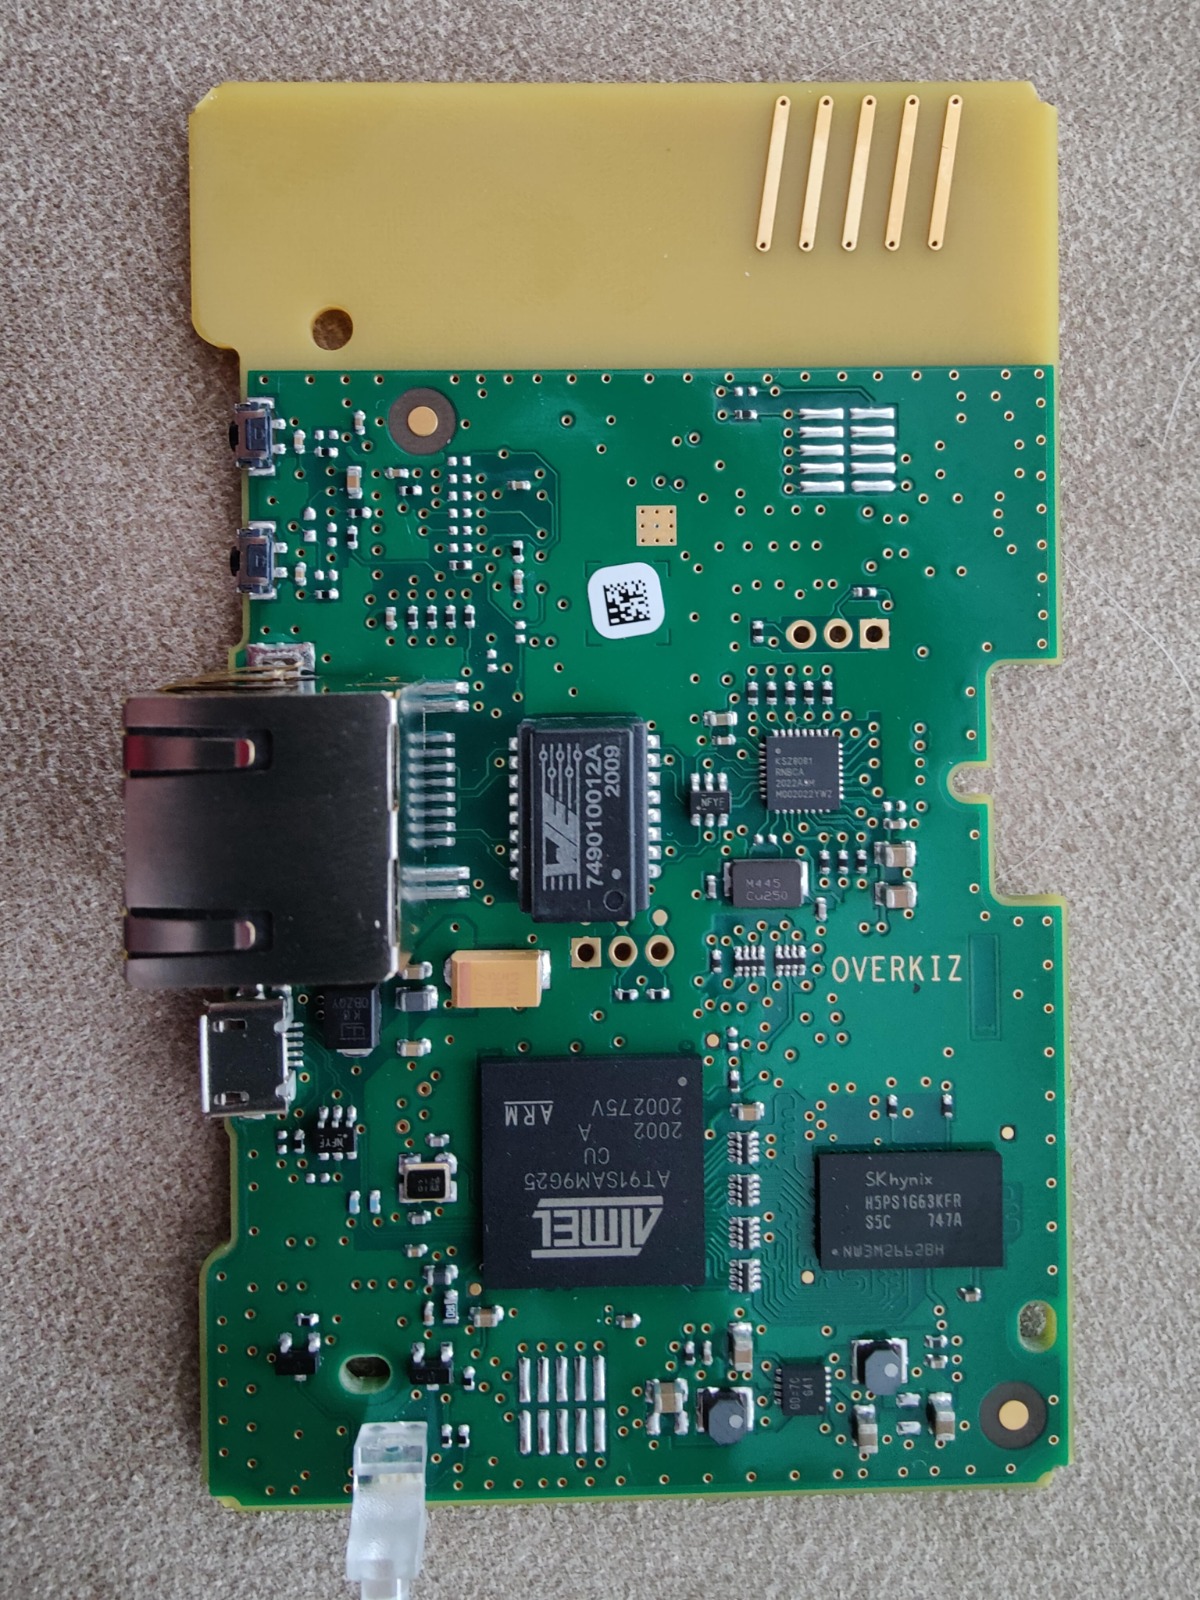
while the other side holds the NAND:

It also has the word “Overkiz” on the board, as well as “Minibox 868”. Throwing those into Google yielded two brochures about the “Overkiz Minibox”:
- https://www.overkiz.com/templates/front/pdf/fiche_minibox_web.pdf
- https://www.overkiz.com/wp-content/uploads/2018/12/FICHE_PRODUIT_MINIBOX_2019-EN.pdf
Turns out the same product is sold under different names:
- Connexoon by Somfy
- Cozytouch by Atlantic
- I-Vista by Cotherm
- HI-KUMO by Hitachi
Also, one of the brochures mentions the device can also operate in “offline” mode. Interesting..
Dumping the firmware
This gave me some leads to go on. I discovered that multiple people had already done some work on the thing:
- https://github.com/Aldohrs/tahoma-jailbreak (This was for the Tahoma, but it’s similar)
- https://www.lafois.com/2020/12/20/rooting-the-cozytouch-aka-kizbox-mini-part-5/
Though both guides weren’t exactly tutorials for what I was trying to do, they did give me some useful pointers. The most important pointer came from the “tahoma-jailbreak” github repository. Here, he found a way to force the ARM SOC into some sort of recovery mode. Long story short, if you provide 3.3v to pin 9 of the flash chip during boot, it’ll go into this mode.
Turns out this is also true for the Connexoon. I spent some time looking around the board with a multimeter and found both a 3.3v source as well as a test pad connected directly to pin 9 on the NAND chip:

All you have to do is bridge these points while you plug in the USB power and then let go. Obviously, plug the other end into your computer. I used a paperclip which worked very well. If you’ve done it correctly the power LED will not turn on and you’ll have a new device connected to your machine:

Now download the following software: https://www.microchip.com/DevelopmentTools/ProductDetails/PartNO/SAM-BA%20In-system%20Programmer
and run these commands:
./sam-ba -p usb -b sam9xx5-ek -a lowlevel
./sam-ba -p usb -b sam9xx5-ek -a extram
./sam-ba -p serial -d sam9xx5 -a nandflash:1:8:0xc0902405 -c read:bootstrap.bin:0x000000:0x20000 -c read:ubi-volume.bin:0x20000
This will write the boatloader and the actual firmware to seperate files.
Getting access
This is where things started to get messy. Although there were some scripts available to do certain things with the firmware, they didn’t work out of the box and some instructions were missing. If you want I can go into details, but globally what you have to to to enable SSH is:
- Mount the root filesystem
- Set a password hash for the
rootuser - Create a symlink for dropbear in
etc/rc5.dby runningln -s ../init.d/dropbear S06dropbear - Re-pack the firmware and write it
Here are my raw notes for this process:
Create local folders
mkdir ubi-root
mkdir ubi-rootB
mkdir extract
Prepare the virtual NAND
sudo modprobe nandsim first_id_byte=0xec second_id_byte=0xa1 third_id_byte=0x00 fourth_id_byte=0x15;
sudo flash_erase /dev/mtd0 0 0
sudo nandwrite /dev/mtd0 ubi-volume.bin
sudo modprobe ubi
sudo ubiattach -p /dev/mtd0 -O 2048
Mount the “root” and “rootB” partition
sudo mount -t ubifs -o rw /dev/ubi0_7 ubi-root
sudo mount -t ubifs -o rw /dev/ubi0_9 ubi-rootB
Optional: resize
Should you run into issues where the UBI partition is out of space, you can enlarge it by using the following commands:
First, check the original size of the partition you want to enlarge. In my case this was root (ubi0_7):
$ ubinfo /dev/ubi0_7

Volume ID:   7 (on ubi0)
Type:        dynamic
Alignment:   1
Size:        167 LEBs (21204992 bytes, 20.2 MiB)
State:       OK
Name:        root
Character device major/minor: 508:8
Currently the size of the root partition is 167 LEBs. In my case I enlarged it to 204 LEBs with the following command:
sudo ubirsvol /dev/ubi0 -n 7 -S 206
If you check the size again you’ll notie it has grown:
$ ubinfo /dev/ubi0_7

Volume ID:   7 (on ubi0)
Type:        dynamic
Alignment:   1
Size:        206 LEBs (26157056 bytes, 24.9 MiB)
State:       OK
Name:        root
Character device major/minor: 508:8
Just make sure it doesn’t grow larger than the space available on the flash chip of the Connexoon.
Enable dropbear
cd ubi-root/etc/rc5.d
sudo ln -s ../init.d/dropbear S06dropbear
cd ubi-root/etc/rc2.d
sudo ln -s ../init.d/dropbear S06dropbear

cd ubi-rootB/etc/rc5.d
sudo ln -s ../init.d/dropbear S06dropbear
cd ubi-rootB/etc/rc2.d
sudo ln -s ../init.d/dropbear S06dropbear
Note: password authentication
Later firmware versions seem to have disabled password authentication. Either:
- Re-enable it by editing
/etc/default/dropbearand commenting out (or removing) this line:DROPBEAR_EXTRA_ARGS="$DROPBEAR_EXTRA_ARGS -s" - Remove the
authorized_keyssymlink in/root/.ssh/and replace it with your ownauthorized_keysfile.
Edit the root hash
Edit the /etc/shadow file in both the root and rootB partitions. Either generate a new one or use this one for password “password”:
root:$1$3.rYPE8p$iS4JnDcUp3ivjo3LTH4Y3.:18799:0:99999:7:::
Unmount partitions
sudo umount ubi-root
sudo umount ubi-rootB
Rebuild the firmware
for i in {0..10}; do name=$(ubinfo -d 0 -n $i | grep Name | awk '{print $2}'); sudo dd if=/dev/ubi0_$i of=extract/$name.bin; done

cd extract
for i in {0..5}; do name=$(ubinfo -d 0 -n $i | grep Name | awk '{print $2}');size=$(ubinfo -d 0 -n $i | grep Size | cut -d '(' -f 2 | cut -d ' ' -f 1); echo -en "[$name]\nmode=ubi\nimage=$name.bin\nvol_id=$i\nvol_size=$size\nvol_type=static\nvol_name=$name\nvol_alignment=1\n\n"; done > config.ini
for i in {6..10}; do name=$(ubinfo -d 0 -n $i | grep Name | awk '{print $2}');size=$(ubinfo -d 0 -n $i | grep Size | cut -d '(' -f 2 | cut -d ' ' -f 1); echo -en "[$name]\nmode=ubi\nimage=$name.bin\nvol_id=$i\nvol_size=$size\nvol_type=dynamic\nvol_name=$name\nvol_alignment=1\n\n"; done >> config.ini

ubinize -o ../ubi-volume_patched.bin -p 131072 -m 2048 -O 2048 -s 512 -Q 1056559212 config.ini
cd ..
Clean-up
sudo umount /dev/ubi0_*
sudo ubidetach -p /dev/mtd0
sudo rmmod ubifs ubi nandsim
Flash the new firmware
./sam-ba_3.5/sam-ba -p usb -b sam9xx5-ek -a lowlevel
./sam-ba_3.5/sam-ba -p usb -b sam9xx5-ek -a extram
./sam-ba_3.5/sam-ba -p usb -b sam9xx5-ek -a nandflash:::0xc0902405 -c erase:0x20000 -c write:ubi-volume_patched.bin:0x20000 -c verify:ubi-volume_patched.bin:0x20000
SSH
Then, reboot the device. If all went well you should now be able to SSH into the device:
user@ubuntu2004:~/projects/somfy/work$ ssh root@192.168.150.7
root@192.168.150.7's password:
at91-kizboxmini version 2021.1.4-12
built on 20210315:204444
debug:   false
release: production
user:    jenkins
0000-1111-2222:~$
(hostname censored, as that is your device PIN)
If you want to change the password for example, simply mount the filesystem as read-write:
mount -o remount,rw /
# do things
mount -o remount,ro /
Enabling the local api
As it turns out, enabling the local API is rather simple. Just four steps:
- Remount the filesystem as rw:
mount -o remount,rw / - Remove the SSL config:
rm /etc/lighttpd.d/ssl.conf - Start the webserver:
/etc/init.d/webserver start - Start the local API:
/etc/init.d/local start
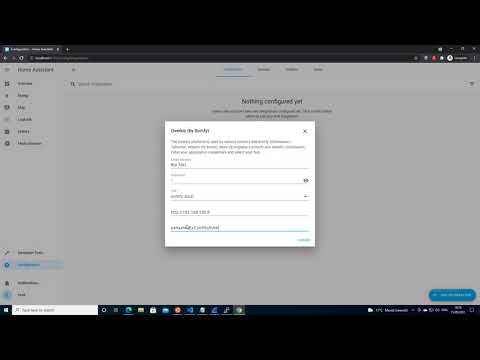
You should now be able to acces the local API with a browser:

Now, this is where I got stuck for a while. The only two things you can visit without authentication are:
- /enduser-mobile-web/1/enduserAPI/apiVersion
- /enduser-mobile-web/1/enduserAPI/register/random_username
The first URL simply prints the version and the second one will always give the following message:
{"error":"Gateway is not in pairing mode.","errorCode":"NOT_IN_PAIRING_MODE"}
No matter what I did, I could not find a way around this. I’ve pressed every combination of buttons on the device I could think of, I’ve spent hours searching through the filesystem, nothing. So I tried creating a user locally. Turns out you can generate a “token” on the device by running:
XXXX-XXXX-XXXX:~$ dbus-send --print-reply --system --type=method_call --dest=com.overkiz.utilities.local /com/overkiz/utilities/local/tokensService com.overkiz.utilities.local.tokensService.createWithRandomKey string:"test" string:"local" int32:2147483648
method return time=1615851235.721217 sender=:1.4 -> destination=:1.11 serial=59 reply_serial=2
   string "G5HNDlxlKlQUprLRlpqn"
XXXX-XXXX-XXXX:~$
There’s three arguments you can give it:
- A label
- A scope
- Expiration in seconds
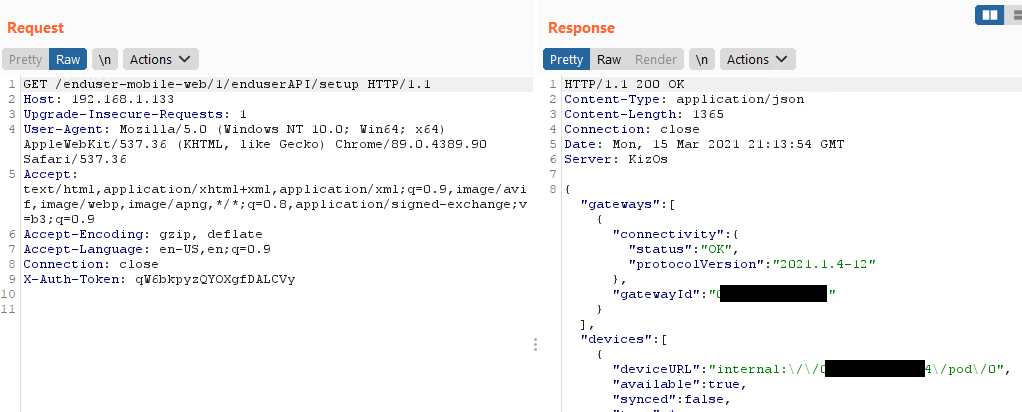
What you get in return is a token you can use in all requests to the API by placing it in the X-AUTH-TOKEN header of your request:
And now you can locally interact with the device :)
Now what?
Well, this is as far as I’ve gotten. Not because I’m stuck, but because I don’t have any devices to connect yet. I thought this was a good time to post this blog, just to see if:
- This project is interesting to anyone and if I should continue to make it production ready
- If there is anyone who can give me some tips and / or pointes about the “pairing mode”
- There is anyone who can offer me some help in general.
I noticed that the API is pretty similar to the cloud version, but not all features are implemented. My endgame would be to make the current Home Assistant Tahoma integration compatible, but I have no clue on how to do that. I’m familier with python, just not with HA integrations.
Anyway, that’s it. I’m open to your thoughts and / or suggestions! To be continued :).